Recreating CRAFT: Hardware Lessons for Dexterous Manipulation
A hands-on walkthrough of my experience rebuilding CRAFT and its integration with a bimanual robot setup for complex real-world manipulation tasks.
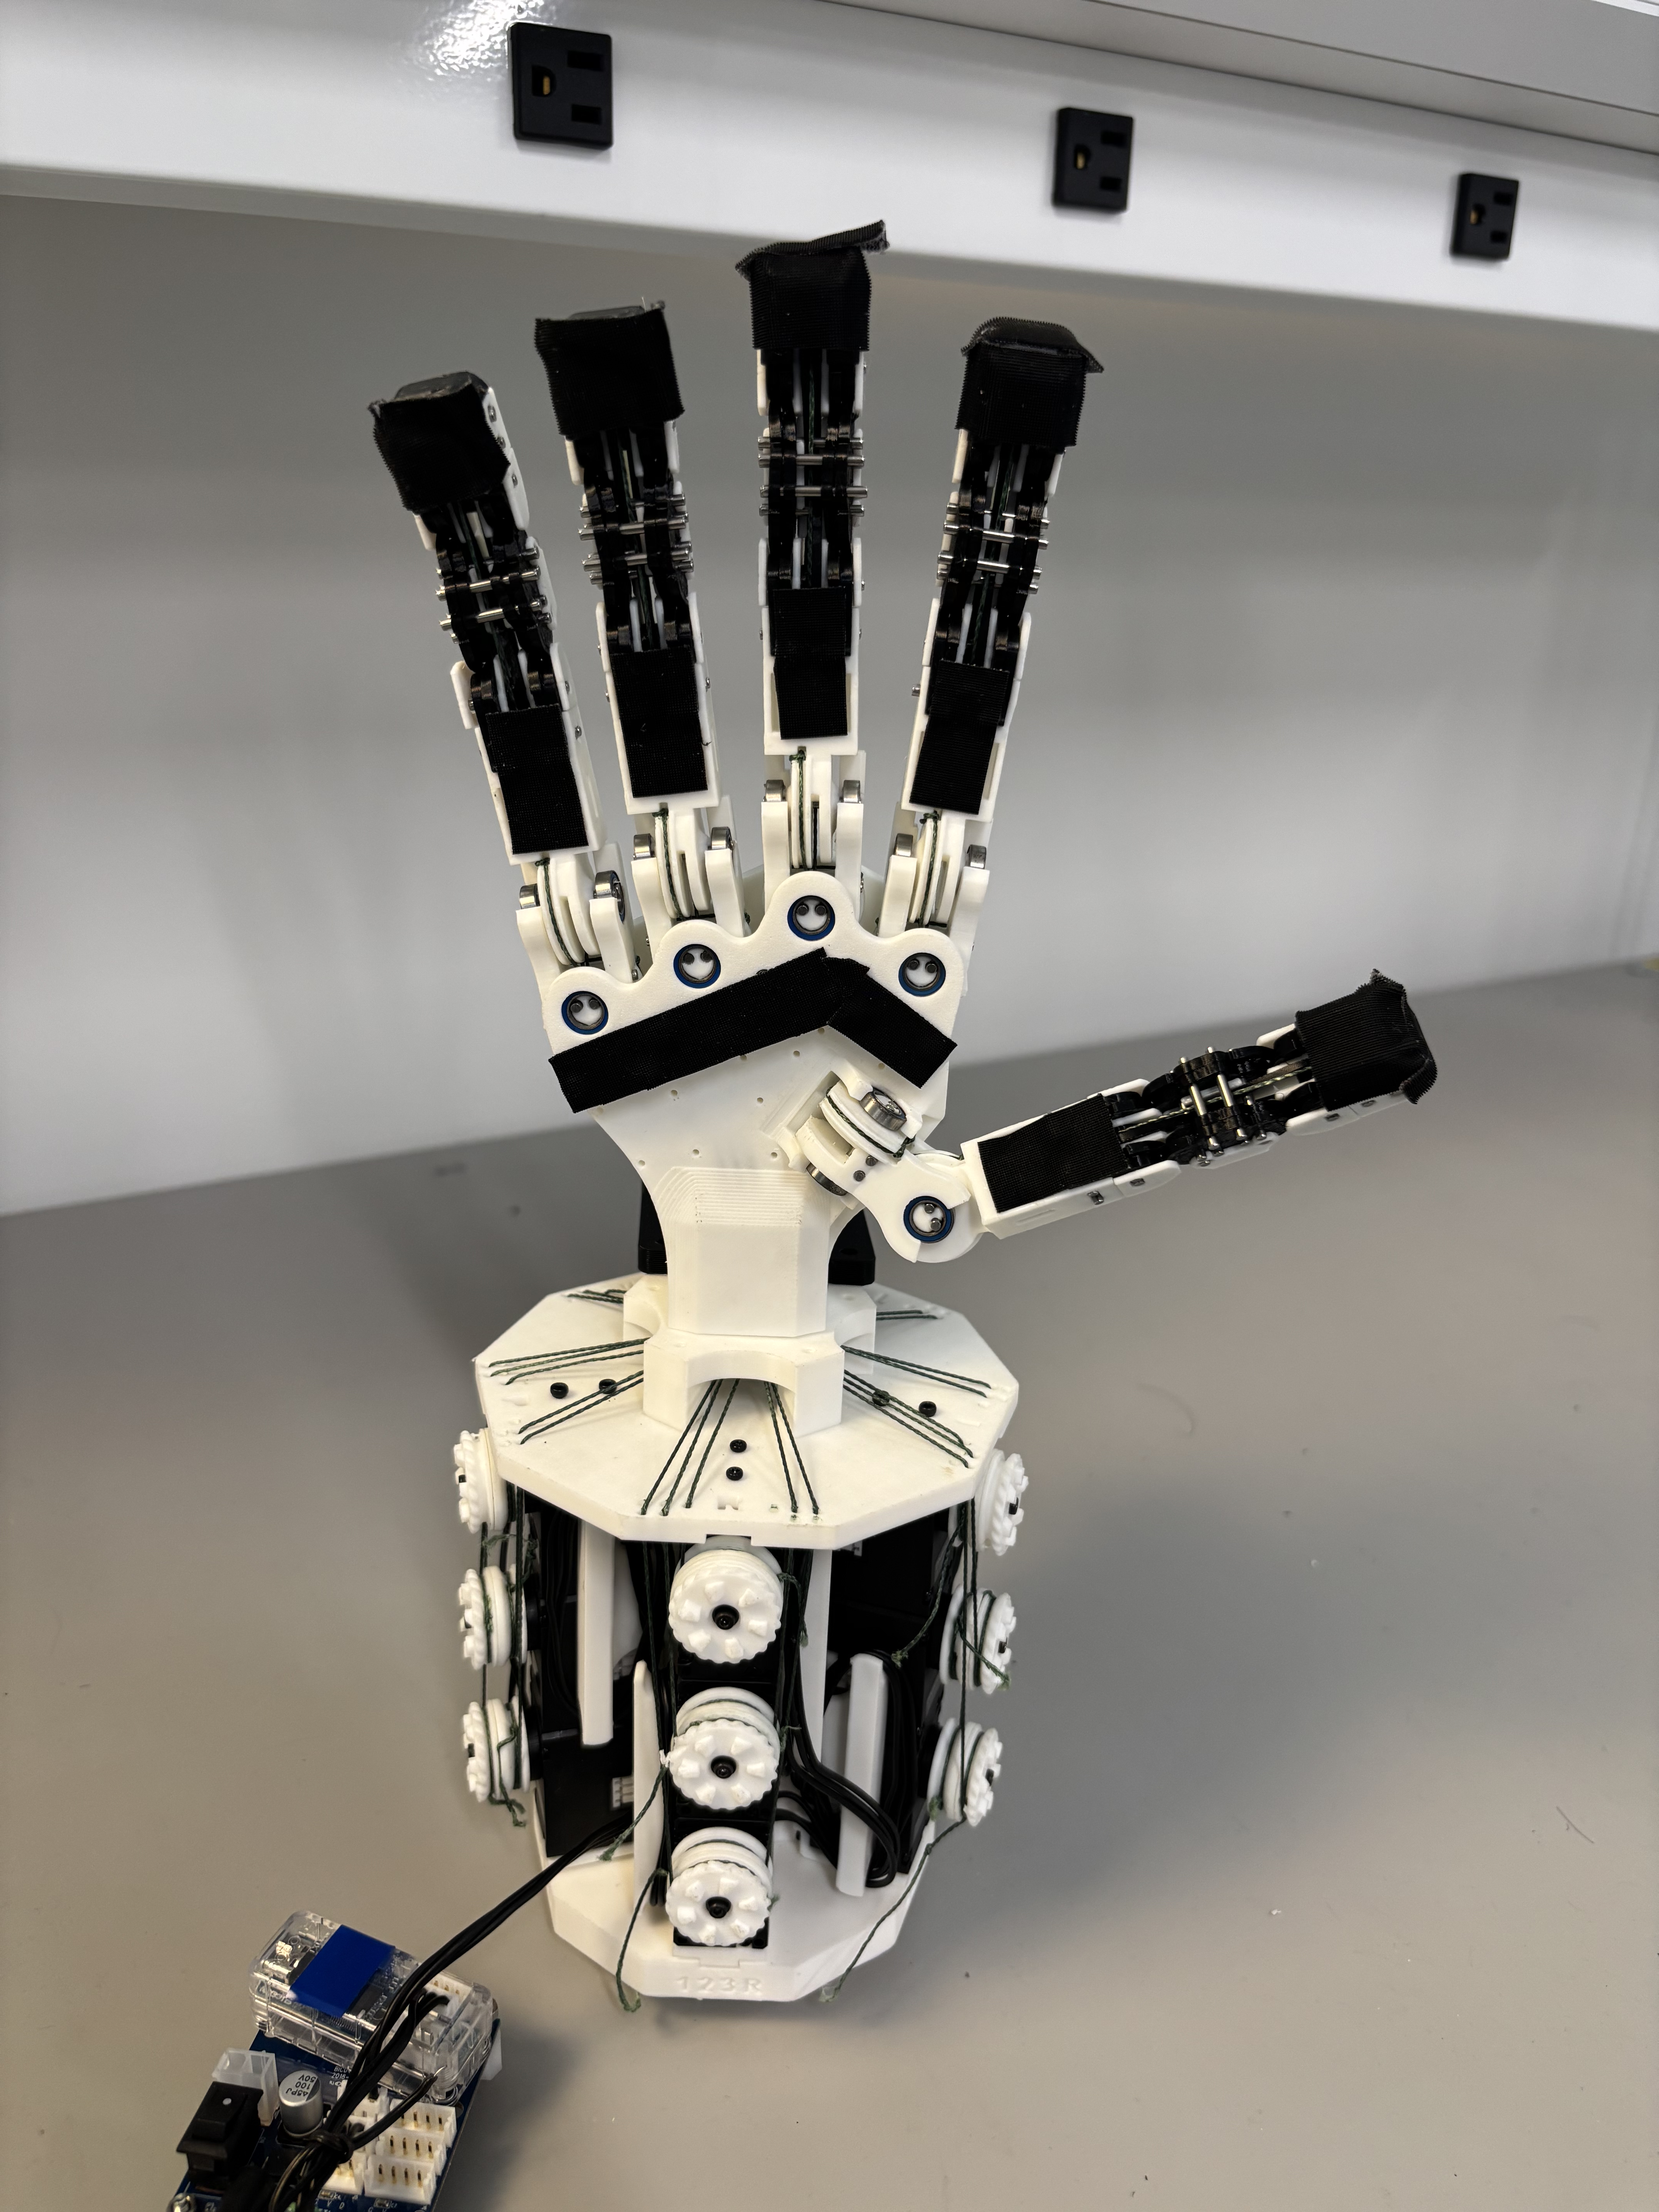
Most robot grippers serve as effective clamps: they open, close, and work well when the object’s shape and orientation are easy to work with. Dexterous hands support more complex forms of manipulation: in-hand rotation, using small, delicate, or thin tools (such as screwdrivers, wrenches, or tweezers), and recovering grasps when contact is imperfect. This blog documents my experience building the CRAFT hand at the UNVEIL Lab, originally developed by Leo Lin and team at UIUC. The design principle is simple and appealing: passive compliance helps contact-rich manipulation, while tendon-driven actuation keeps the fingers compact.
The Original CRAFT Hand
CRAFT stands out for its low-cost design and passive compliance. The hand costs under $600, weighs 800 g, and can be built using 3D-printed parts and off-the-shelf components. For compliance, CRAFT uses rigid PLA for the finger links and soft TPU at the joints to preserve the hand's structure while absorbing contact forces. This helps the hand handle fragile, deformable, or irregularly shaped objects without turning each finger into a fully soft, hard-to-control structure.
The hand provides a wide range of dexterous capabilities: each finger has base flexion/extension, base abduction/adduction, and coupled middle/fingertip flexion, giving the hand 15 active degrees of freedom plus 5 passive degrees of freedom. The motors sit in the forearm and pull the fingers through tendons, keeping the hand light and close to human scale. The original paper reports coverage of all 33 Feix grasp types and demonstrates teleoperation with delicate objects such as eggs, raspberries, chips, and wine glasses.
Step 1: Building the Compliant Fingers
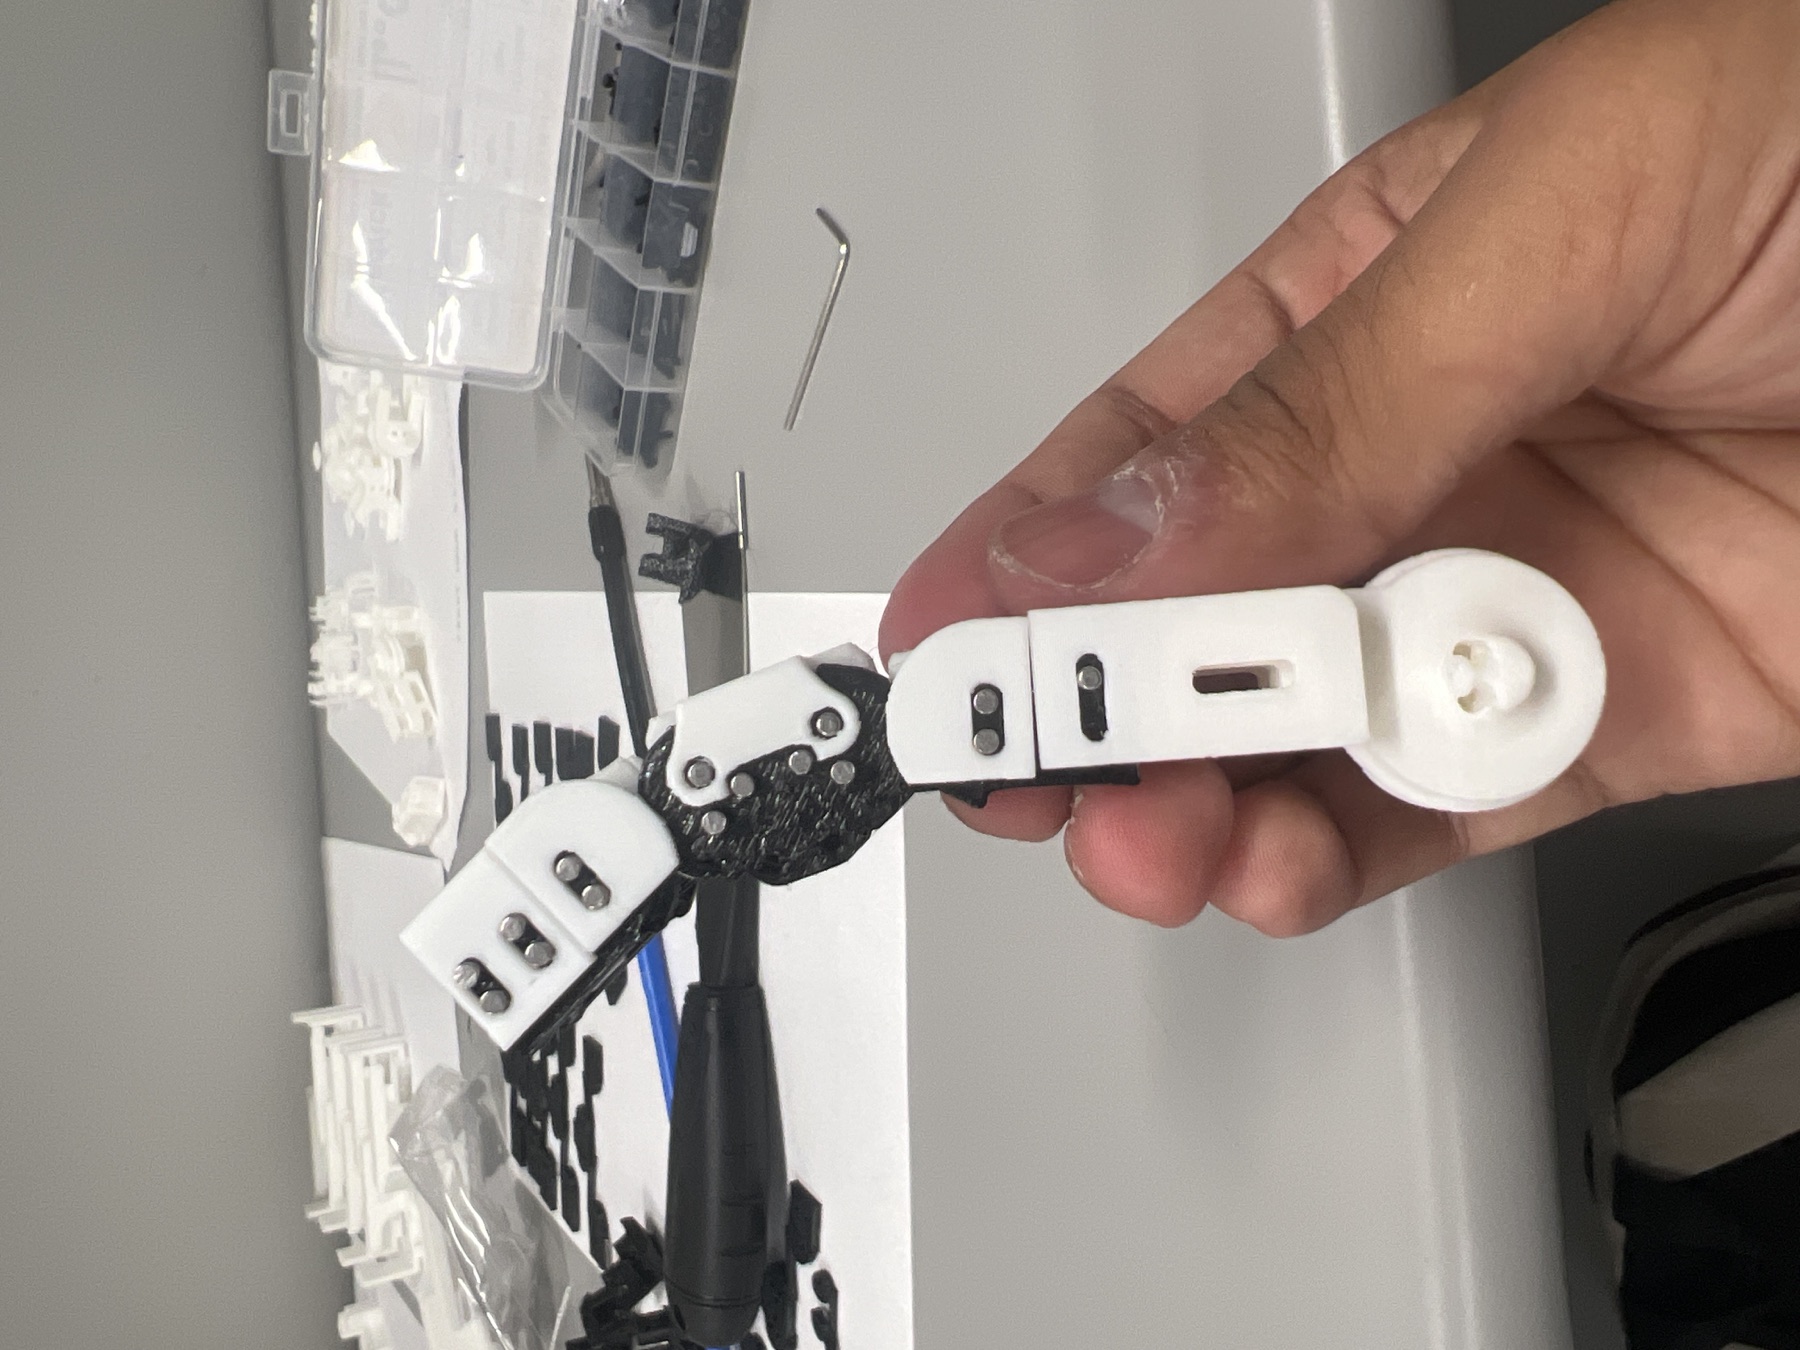
I began by building the first finger. As shown in the images, each finger combines white PLA link shells with black TPU joint pieces. The white PLA parts provide the rigid finger links, and the black TPU pieces create the flexible joints between them. This gives the finger enough structure to move predictably while still bending under contact. During finger assembly, the main challenge was alignment: the pins, fasteners, and 3D-printed parts had to seat cleanly without compressing the TPU so much that it restricted bending motion.
Building one module first made it possible to test the PIP/DIP stack before repeating the process across all five fingers. The finger needed to bend smoothly, return without obvious binding, and minimize interference between the printed parts. Once this validation passed, I assembled the remaining finger modules and staged them around the palm for tendon integration.
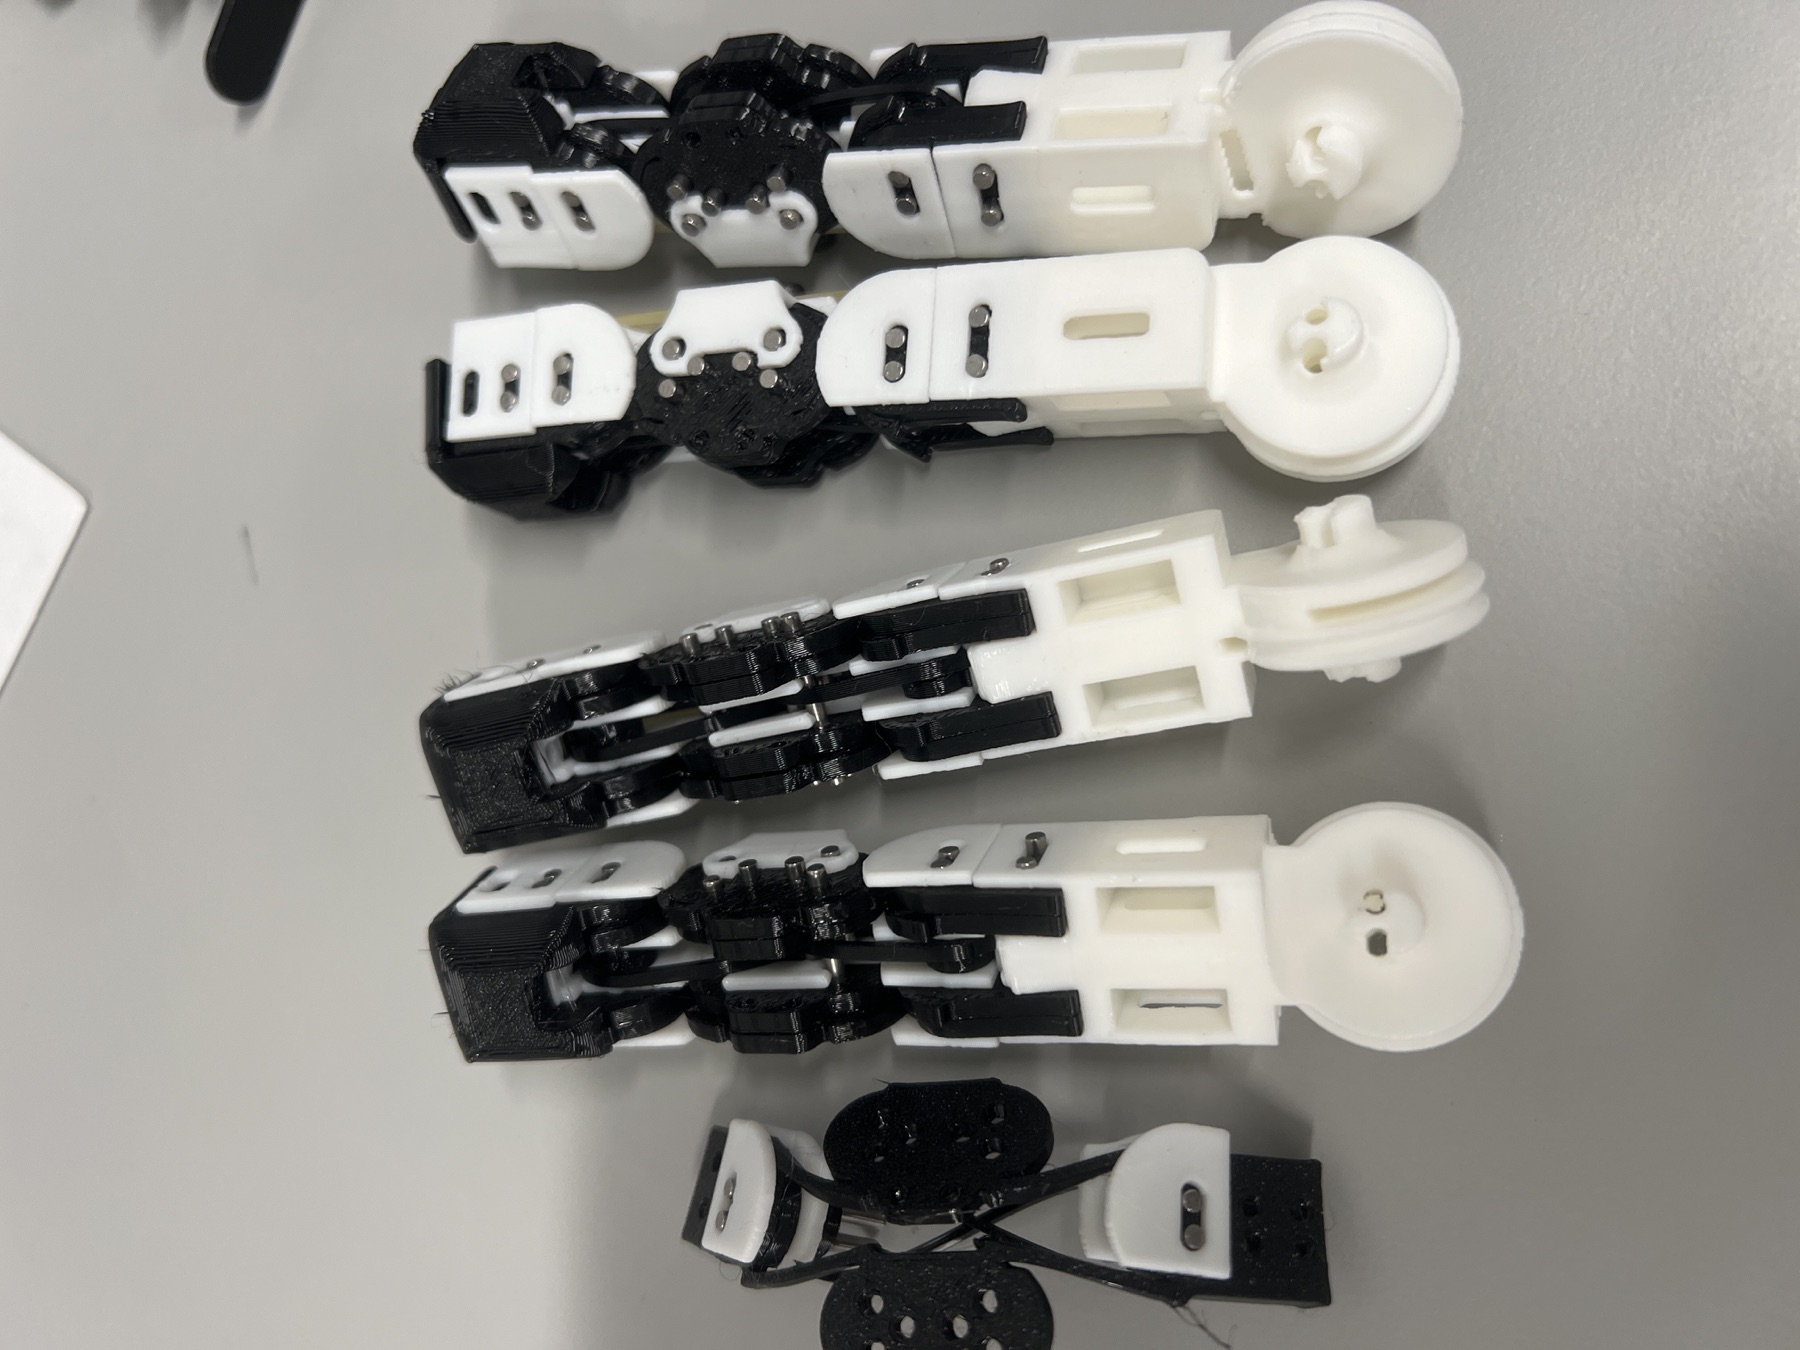
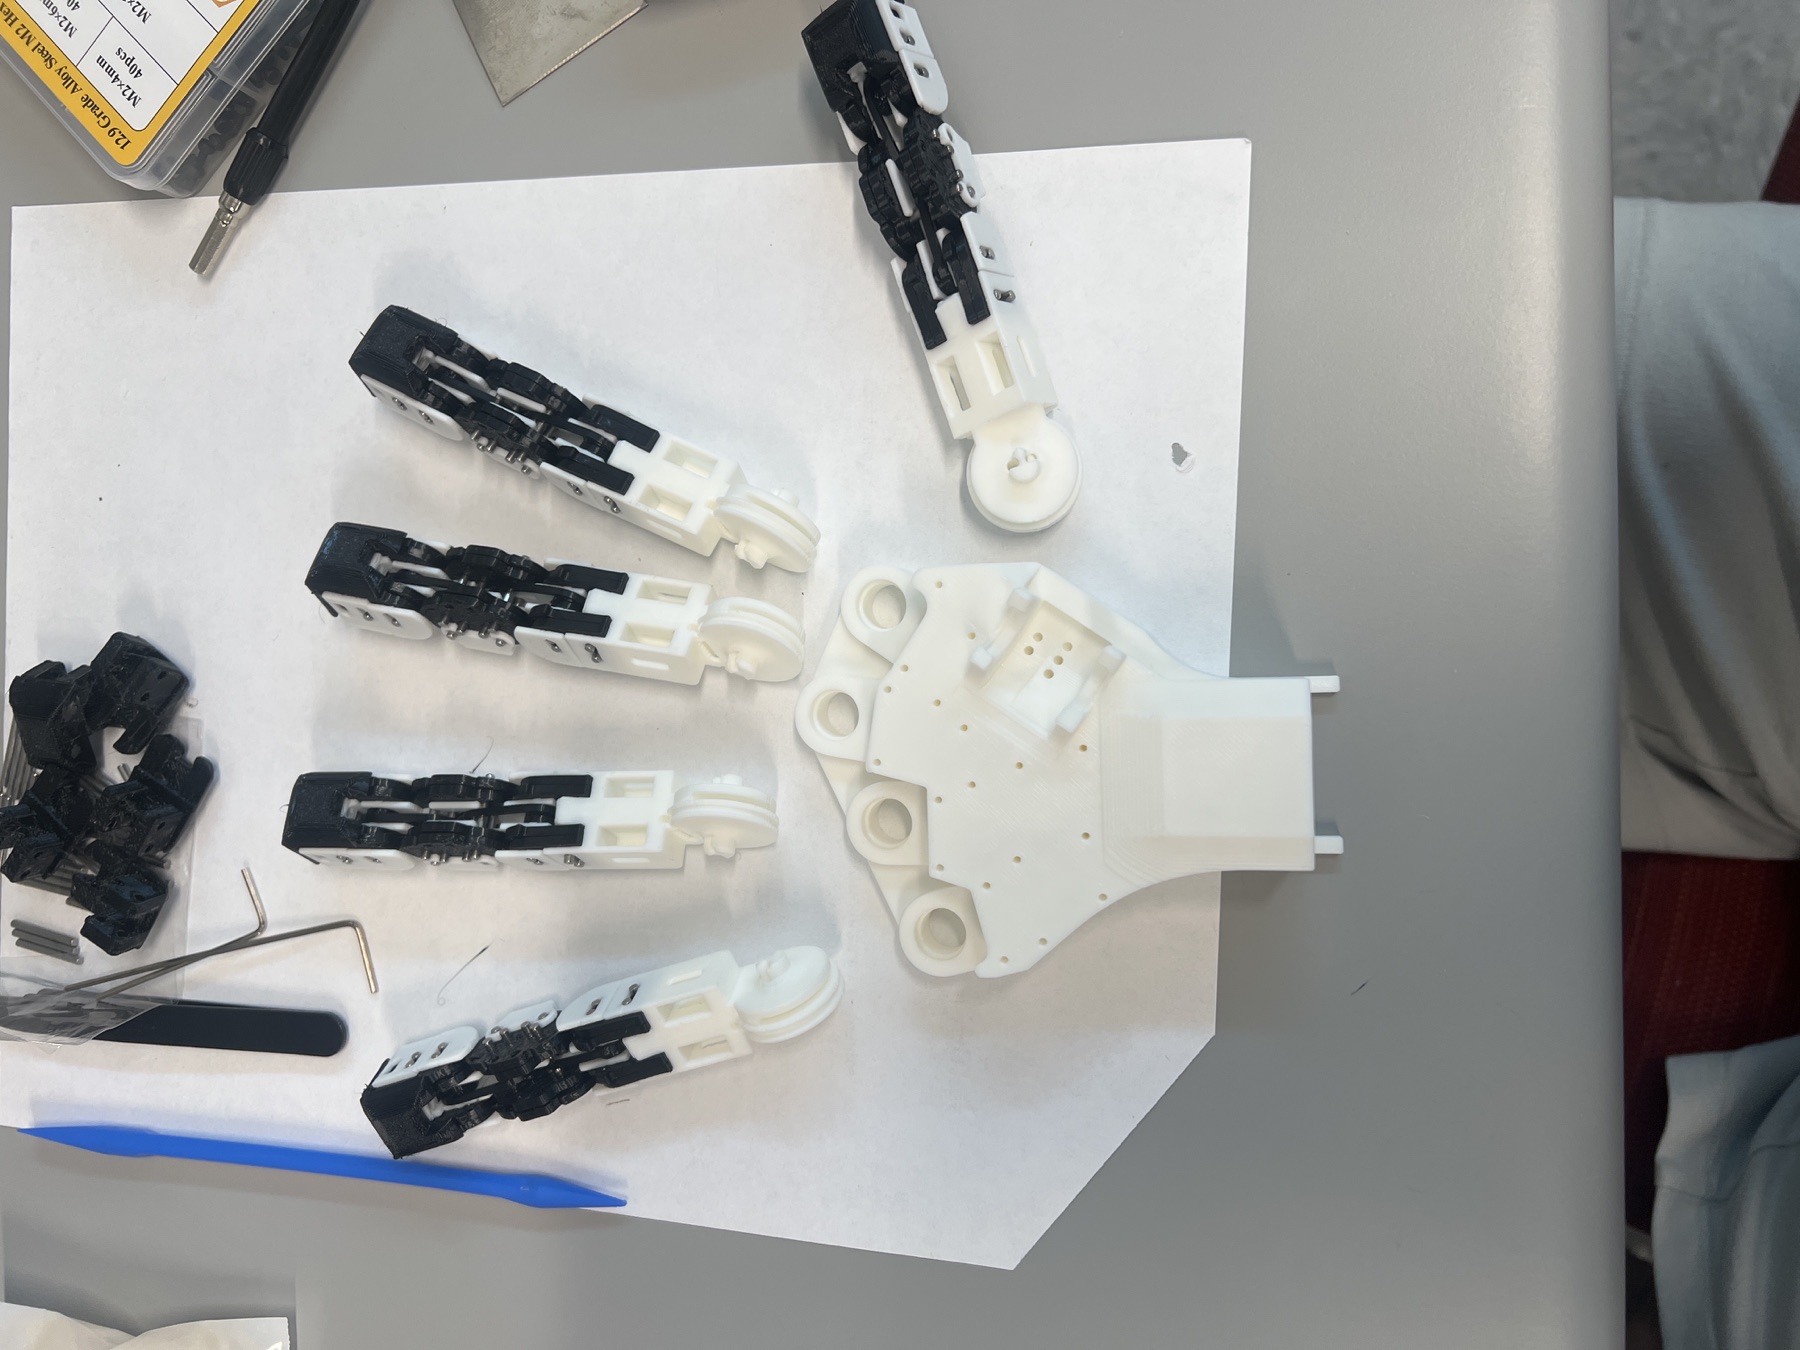
Tendon routing turned the finger modules into actuated fingers. Pulling the flexion tendon curls the finger, and the rolling-contact geometry keeps the PIP/DIP joints moving together instead of letting the fingertip fold independently. The key requirement was to produce smooth, repeatable actions and reduce delayed or inconsistent fingertip motion from the same motor command.
Step 2: Mounting CRAFT on the Existing Bimanual Setup
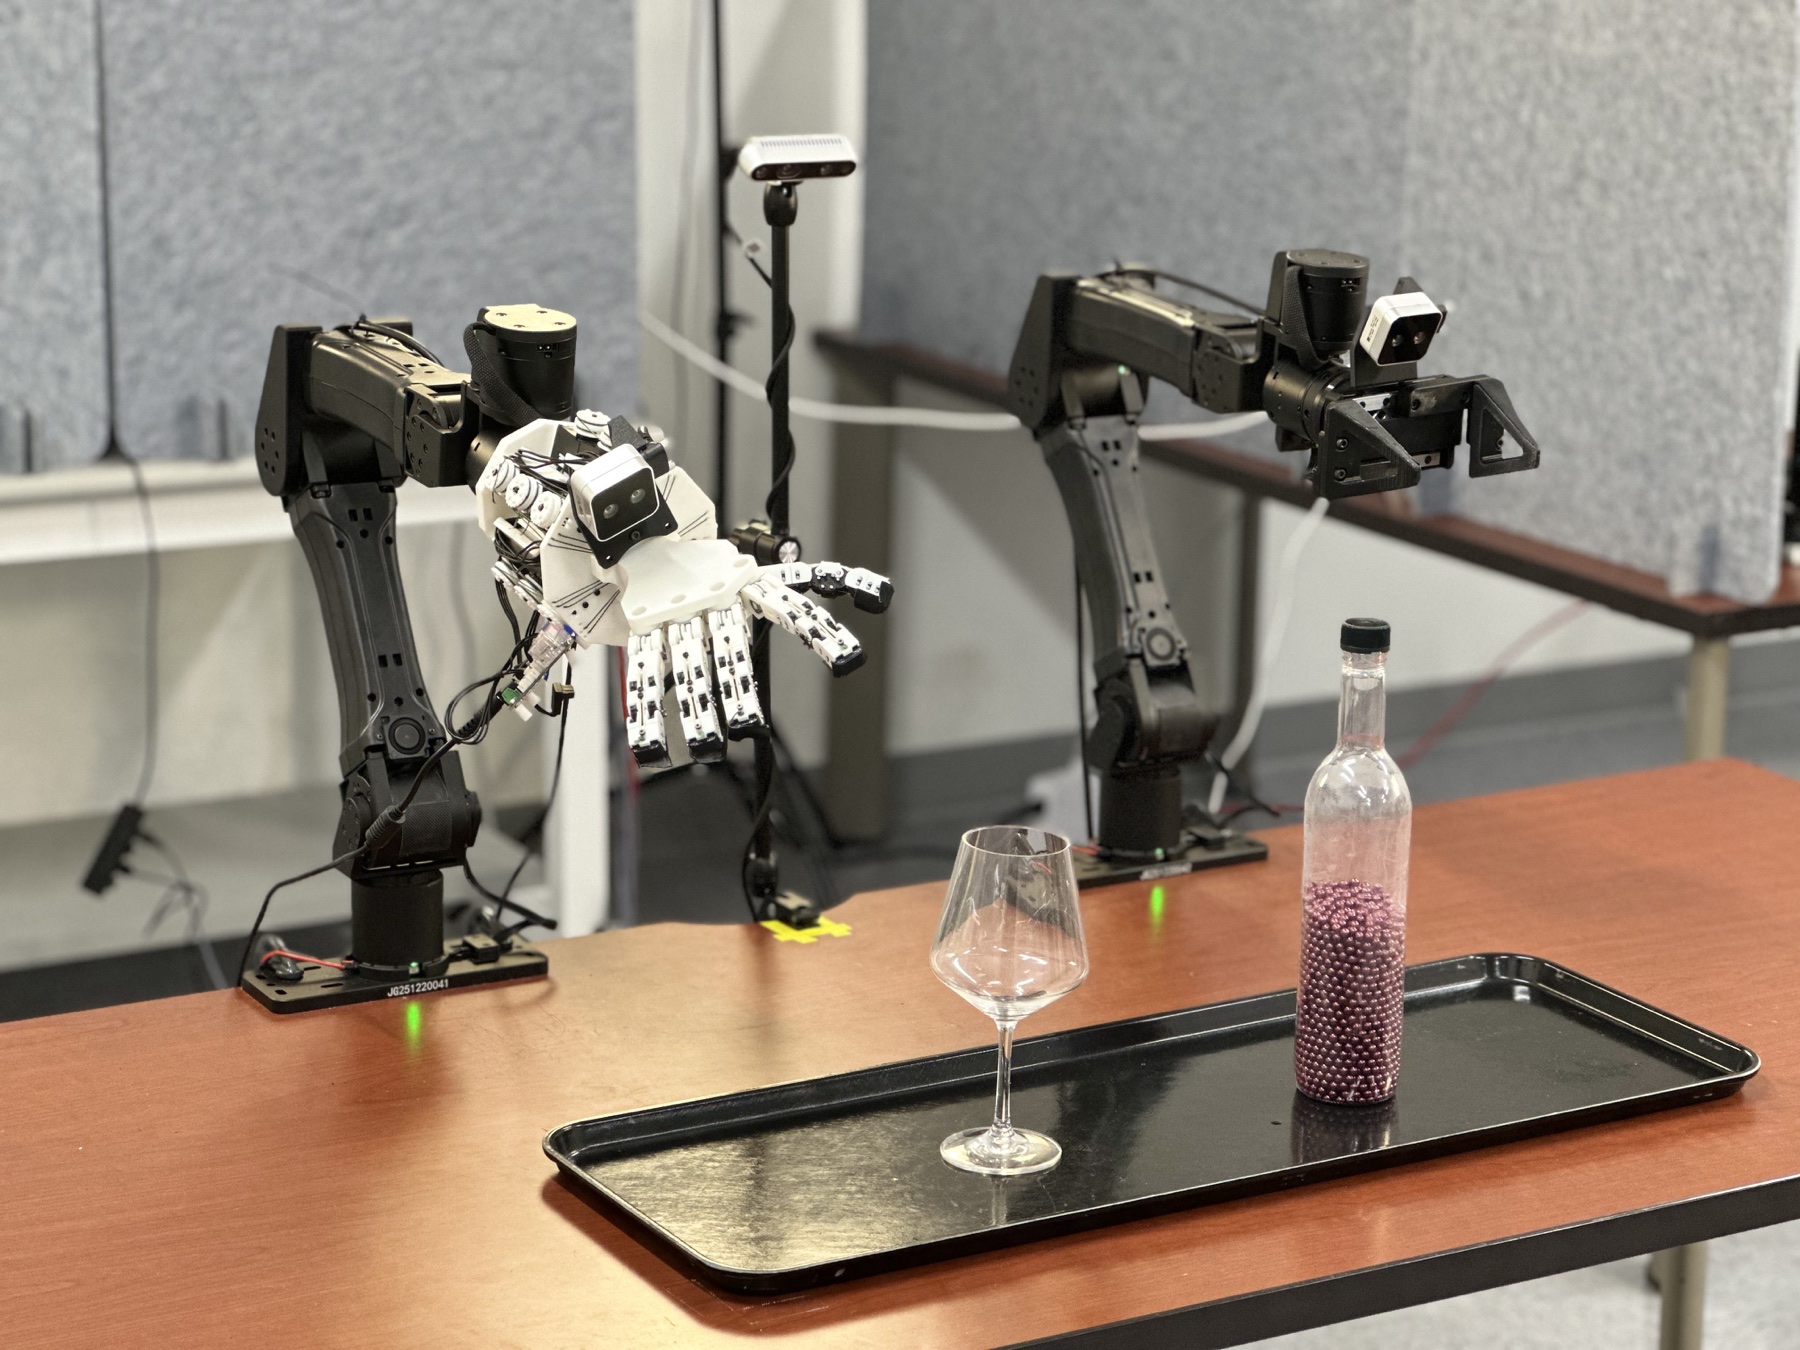
After assembly, the next step was integrating CRAFT with our lab’s existing bimanual I2RT Yam Ultra setup. The original setup used stock parallel-jaw grippers, which are reliable for simple pick-and-place tasks but reduce the end-effector command to opening and closing. Mounting CRAFT on the wrist turned the hand from a standalone build into part of the robot platform. As an initial sanity check, the payload budget was sufficient: the Yam Ultra is rated for 4 kg, while CRAFT is reported at about 800 g. This left enough margin for the adapter, fasteners, and wiring.
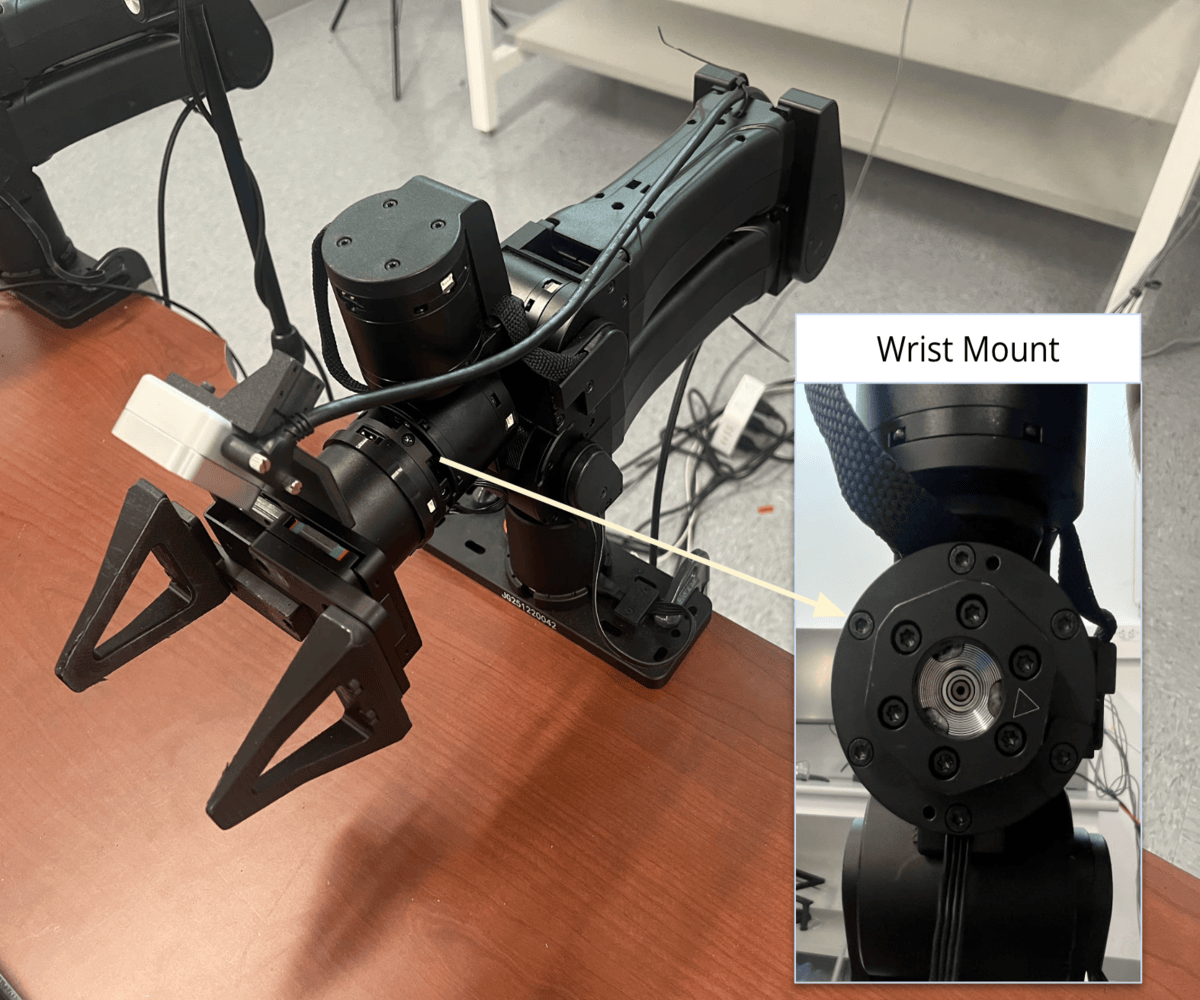
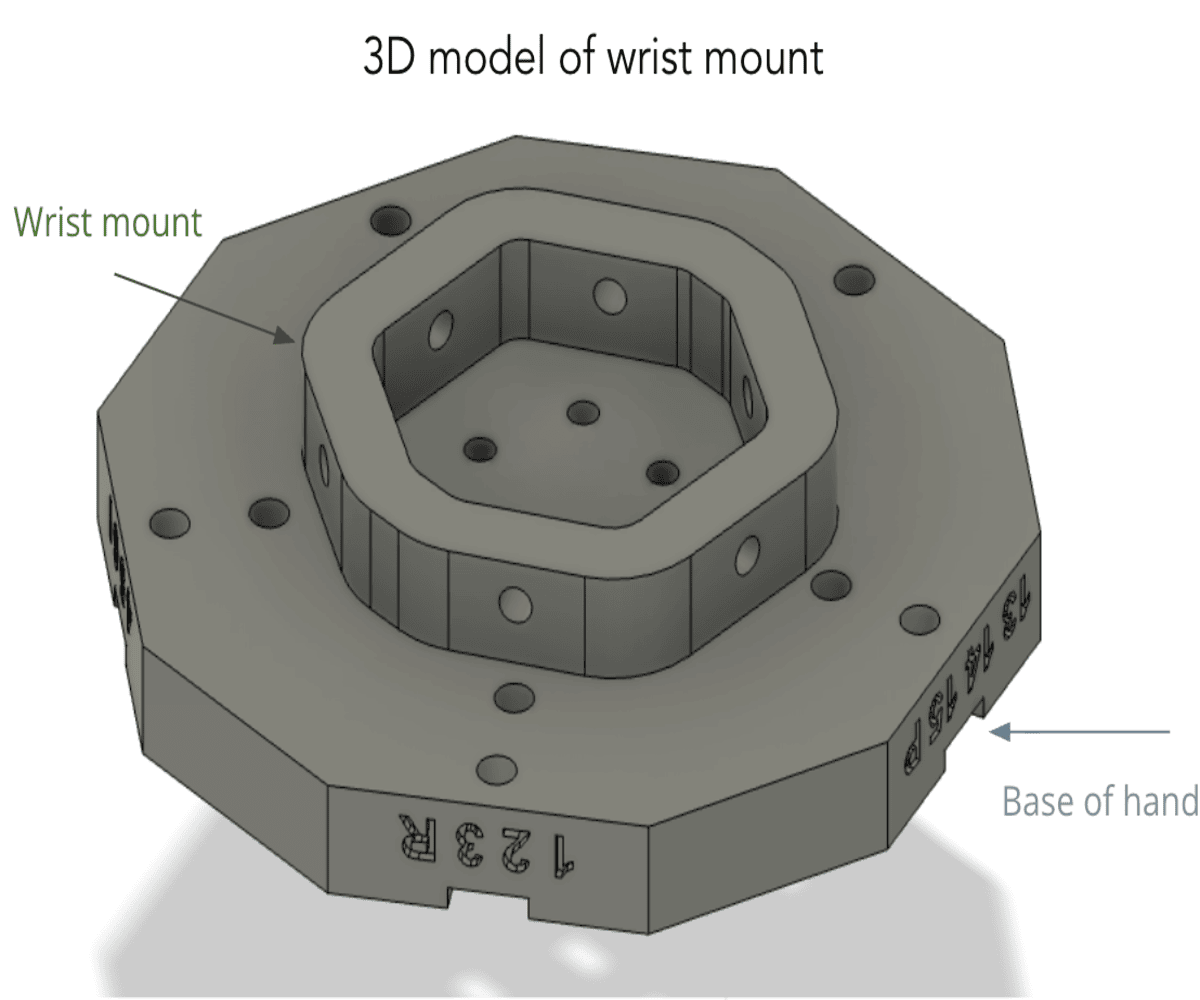
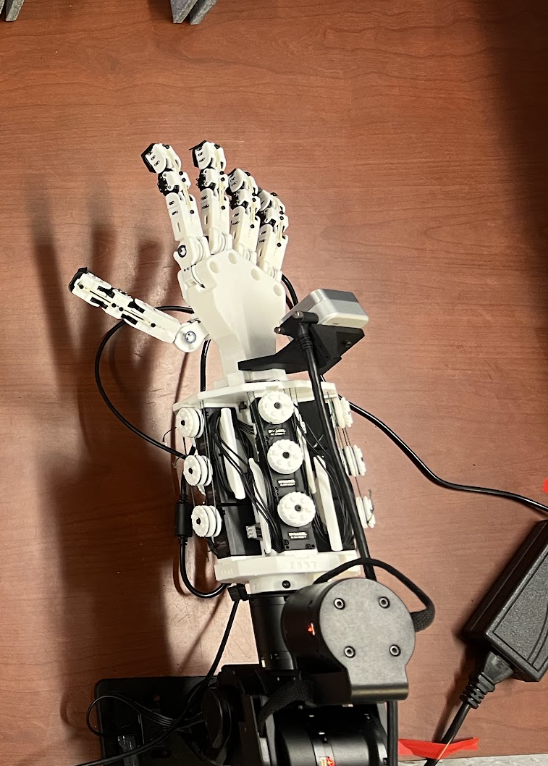
To create an adapter, I used Autodesk Fusion and the available I2RT STL files as the starting geometry for a printable wrist mount. The design requirements were mostly mechanical: match the Yam wrist pattern, interface cleanly with the CRAFT mount, keep the fingers oriented toward the workspace, preserve wrist clearance, and leave a usable path for wiring. I checked the wrist motion in MuJoCo before printing, then mounted the hand on the left arm and staged the workspace for teleoperation. The image shows our bimanual teleoperation stack with one dexterous hand.
Step 3: Quest-Based VR Teleoperation
With the hand mounted, the next requirement was a control interface for collecting demonstrations. We used Quest-based VR teleoperation, where the headset tracks the operator's hand pose and a retargeting layer maps that motion into CRAFT's motor limits. The thumb needed extra calibration because small tracking or frame errors created large changes in the commanded thumb motion.
For arm motion, we used an Open-TeleVision-style setup: the operator's wrist pose commands the robot wrist and guides the arm. Once the wrist frame was aligned, the arm and hand could be controlled together instead of as two separate systems. The early demonstrations started with simple pick-and-place tasks and then moved to a wine-pouring setup assisted by GLIDE guardrails. In that setting, GLIDE filters unstable commands around the glass grasp and pour while the operator still provides the task-level motion.
Pi0.5 Policy Rollout
We also tested a rollout using pi0.5 with GLIDE assistance using the collected human demonstrations. This setup changes the role of the operator: instead of directly commanding every motion, the learned policy attempts the wine-serving behavior while GLIDE filters unstable commands around the grasp and pour.
Challenges and Lessons Learned
As a beginner to hardware projects, some lessons seem obvious in hindsight, but they are still worth highlighting because others might run into similar challenges. For this project, the hardest part was turning a printed hand into a dependable robot system: parts, assembly, calibration, contact, and real-robot debugging.
- Buy spare parts! I made the mistake of ordering the exact quantity of components. First, I ran out of metal dowels after some were lost. Then, a motor broke during construction and I did not have a replacement. These unnecessary delays added over a week to the build and kept us from starting robot experiments earlier.
- Camera views matter. The initial arm setup did not provide a good view from the hand’s perspective. We added a camera mount on top of CRAFT to visualize contact, but our setup still makes it hard to see grasp formation and slip clearly. It would be useful to add more cameras from other perspectives.
- Object slip was a recurring challenge. For example, the hand could wrap around the wine bottle and still slip during pouring. This showed that we needed a stronger grasp, not just finger closure. Friction tape reduced some slip, but we still want better grip assistance.
- Motor torque can become a hardware limit. The small DYNAMIXEL servos keep CRAFT compact and affordable, but they limit grasp strength during firm grasps, slip recovery, and tasks where the object applies a moment to the fingers.
The main lesson is that getting a full hardware setup working takes much more effort than getting one part to move correctly. It also takes time to make the setup repeatable, since small changes in assembly, calibration, contact, or object placement can change the outcome.
Next Steps
The next goal is to improve the retargeting and teleoperation infrastructure to create a repeatable experiment platform for data collection. This includes reducing the amount of manual adjustment needed between runs and making failures easier to diagnose.
- Make tendon routing more precise. Better retensioning points between experiments would make the mapping from motor commands to finger motion more consistent. Finger modules should also be easier to remove without disturbing the rest of the hand.
- Improve fingertip contact. Replace the temporary friction tape with pads or coatings that provide repeatable grip without making the fingers too stiff. It would also be useful to add fingertip contact feedback, so grasp failures are not diagnosed only from camera views and visual inspection.
- Improve the simulation environment. The current XML files have some errors, and we do not yet have infrastructure to train policies or collect data with simulation and RL. A better Yam + CRAFT simulation would support larger-scale data collection for manipulation tasks.
- Improve thumb calibration. Thumb retargeting should support more complex grasps and pinches; the current Quest retargeting still leaves room for improvement.
Citations
- CRAFT: A Tendon-Driven Hand with Hybrid Hard-Soft Compliance (arXiv)
- Open-TeleVision: Teleoperation with Immersive Active Visual Feedback (code)
- GLIDE: Guardrails for Learning from Infeasible Demonstrations Efficiently. Anonymous Authors. Preprint.
- pi0.5: a Vision-Language-Action Model with Open-World Generalization (arXiv)